In this article, I will discuss and configure High Availability (HA) in Palo Alto Networks Firewall. High Availability provides redundancy in the computer network. Thus, it avoids a single point of failure.
Palo Alto Networks firewalls can be configured in High Availability including VM Series Firewalls. Palo Alto Networks Firewalls PA-800, PA-3000, PA-3200, PA-4000, PA-5000, PA-5200, and PA-5400 series devices have dedicated High Availability Links.
For VM series firewalls and PA-220 devices, you can use data plane interfaces to use High Availability (HA).
Here, we will configure High Availability on the Palo Alto VM50 devices having PANOS 10.1.5. Let’s quickly start with the configuration.
How to configure High Availability in Palo Alto Networks Firewalls
Before moving to the High Availability configuration, let’s understand the scenario we prepared for this article.
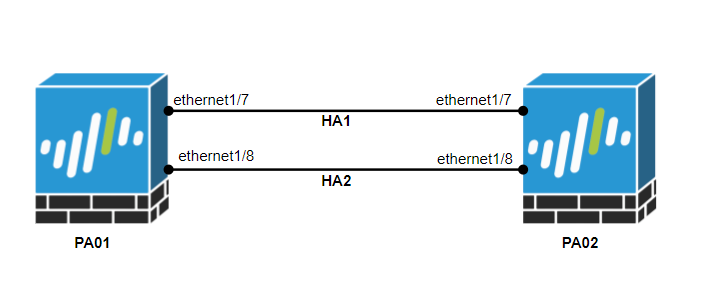
I have a Palo Alto Networks Firewall having a management interface and 8 data plane interfaces. I am using ethernet1/7 & ether1/8 as High Availability interfaces, as shown in the below image.
Step1: Configure the interfaces in High Availability Mode
First, we will configure the data plane interfaces in High Availability mode. This step is optional if you have a higher range of Palo Alto Networks devices.
Navigate to Network > Interface > Ethernet > select ethernet1/7 and select interface type HA.

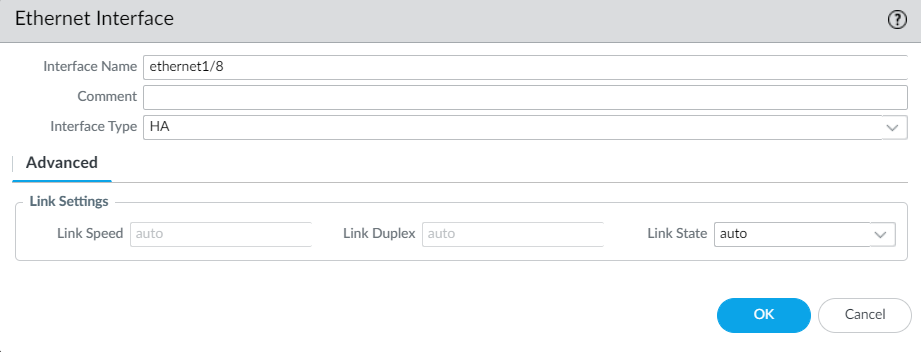
Now, Navigate to Network > Interface > Ethernet > select ethernet1/8 and select interface type HA.
Navigate again to Network > Interface Ethernet, and you will notice that ethernet1/7 and ethernet1/8 are configured in the High Availability.

Step2: Configure the High Availability on the First Palo Alto Networks Firewall
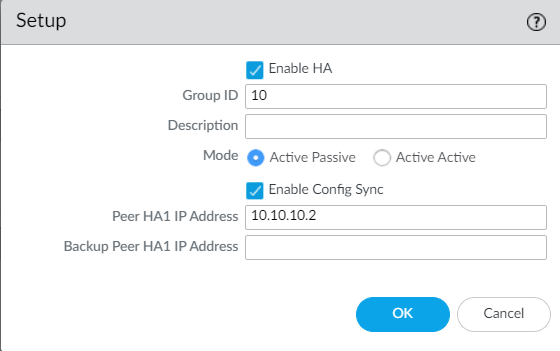
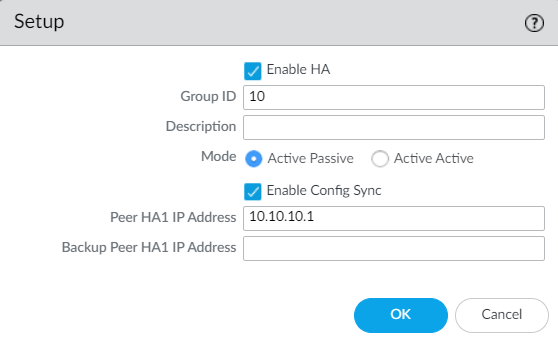
Navigate to Device > High Availability > General > Setup, enable the High Availability and configure the Group ID between 1 to 63. Select mode as Active-Passive, define peer HA1 IP address and click on OK.
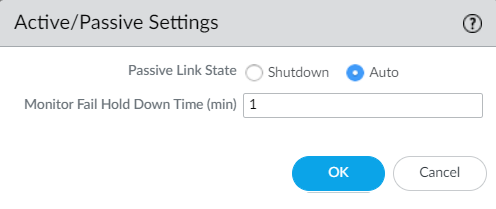
Select the Active Passive Settings and configure Passive Link State to Auto to ensure a faster failover.
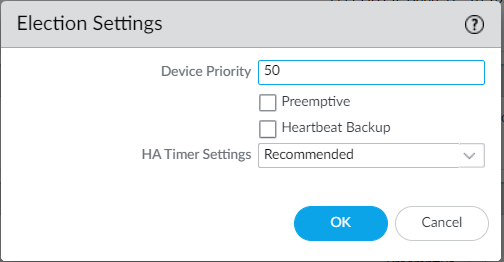
Navigate to Election settings and define the Device Priority and Preemption settings.
We must need to Device Priority while confiruing the High Availability. Lower numerical value of Device Priority will consider as higher priority.
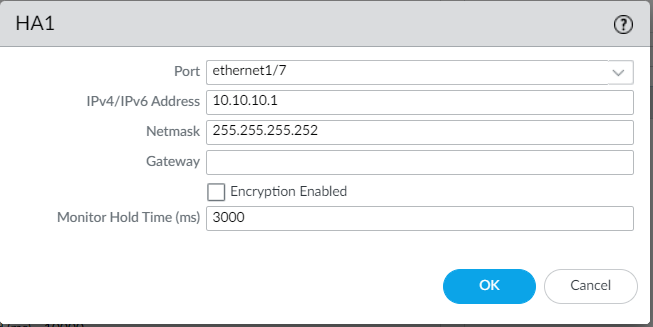
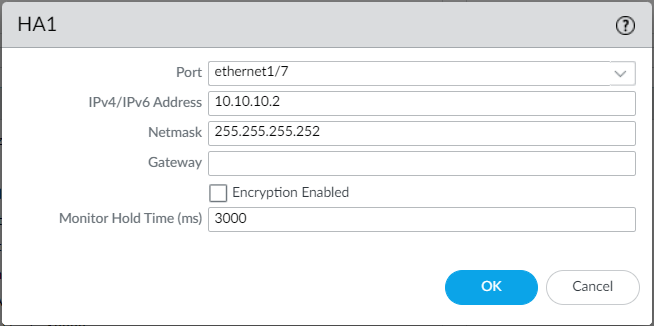
Now, navigate to the Device > High Availability > HA Communication and define the HA1 and HA2 links. Select the HA1 and define the Port and IP Address.
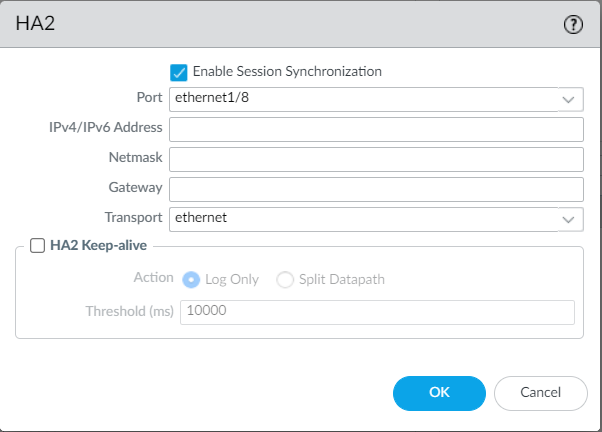
Edit the HA2 configuration under the Data Links and define the port, IP address, and Transport method.
If the HA2 is connected back-to-back, you can select Transport method as ethernet, and do not need to define the IP Address.
Commit all the changes, and you will notice that HA is configured on our Primary Palo Alto Networks Firewall. However, as of now, we don’t have secondary device information.
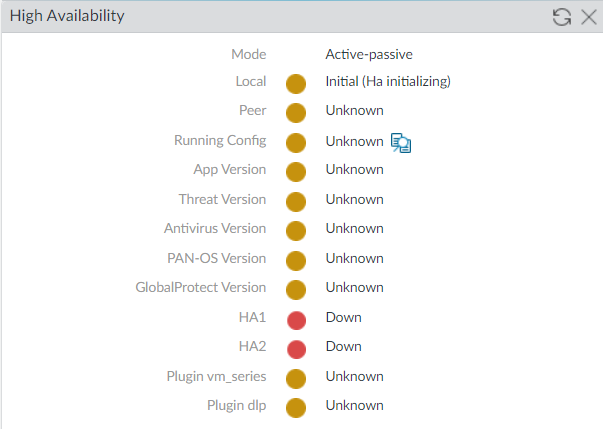
That’s it! We have configured the High Availability on the First Palo Alto Networks Firewall.
Step3: Configure the interfaces in High Availability Mode on the Second Palo Alto Networks Firewall
In this step, we will configure the data plane interfaces in High Availability mode on the secondary firewall. Again, this step is optional if you have a higher range of Palo Alto Networks devices.
Navigate to Network > Interface > Ethernet > select ethernet1/7 and select interface type HA.
Now, Navigate to Network > Interface > Ethernet > select ethernet1/8 and select interface type HA.
Navigate to Network > Interface Ethernet, and you will notice that ethernet1/7 and ethernet1/8 are configured in the High Availability.
Step4: Configure the High Availability on the Second Palo Alto Networks Firewall
Navigate to Device > High Availability > General > Setup, enable the High Availability and configure the same Group ID between 1 to 63. Select mode as Active-Passive, define peer HA1 IP address and click on OK.
Now, select the Active Passive Settings and configure Passive Link State to Auto to ensure a faster failover.
Navigate to Election settings and define the Device Priority and Preemption settings.
We must need to Device Priority while confiruing the High Availability. Lower numerical value of Device Priority will consider as higher priority.

Now, navigate to the Device > High Availability > HA Communication and define the HA1 and HA2 links. Select the HA1 and define the Port and IP Address.
Edit the HA2 configuration under the Data Links and define the port, IP address, and Transport method.
If the HA2 is connected back-to-back, you can select Transport method as ethernet, and do not need to define the IP Address.
Finally, we will commit all the changes and navigate to the Dashboard > High Availability Widget on the First Palo Alto Firewall to get the High Availability information.
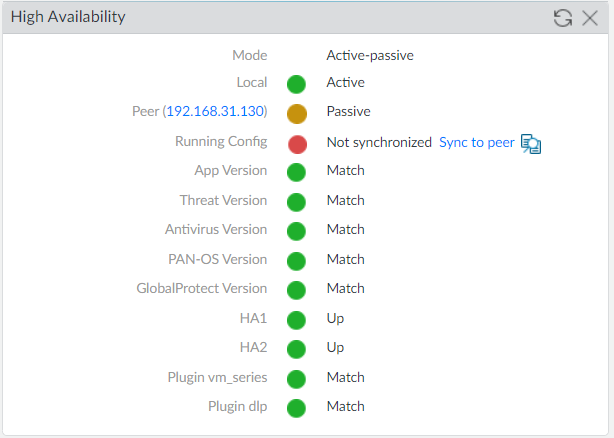
After the High Availability configuration, you will notice that the Running Config is not synchronized. Use the Sync to peer option from the Active Palo Alto Networks firewall to sync the configuration with the peer firewall.
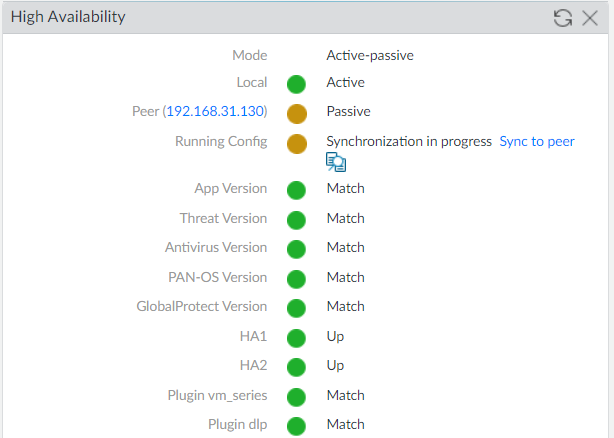
Let’s wait for a couple of seconds to get it fully synchronized.
Step 5: Configure Link Monitoring and Path Monitoring
We should configure the Link Monitoring or Path Monitoring to trigger an automatic failover. This step is optional but recommended. Navigate to Device > High Availability > Link and Path Monitoring and define the Link or Path Monitoring. Click on the Add under the Link Monitoring and define your data plane interfaces.
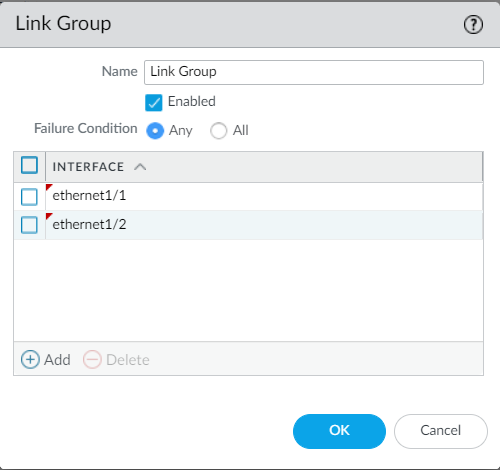
After this configuration, if any one of the data plane interfaces goes down, the firewall will perform a failover.
Related Articles
- Automated backup from Palo Alto Networks Firewall without Panorama
- How to install Cisco ASAv Firewall in EVE-NG Simulator
- How to configure Static Routes on Cisco ASA Firewall
- Cisco ASA: Security Levels and Zones Explained
- Cisco ASA Configuration Backup using SCP, TFTP, and ASDM
Summary
In this article, we configured High Availability on the Palo Alto Networks firewall. High Availability (HA) is necessary to avoid a single point of failure in the computer networks. Palo Alto Networks firewall synchronizes the configuration and ongoing sessions with peer devices to perform a smooth failover with minimum downtime.
I hope you have enjoyed this article. Please let me know if you need any information regarding this article.